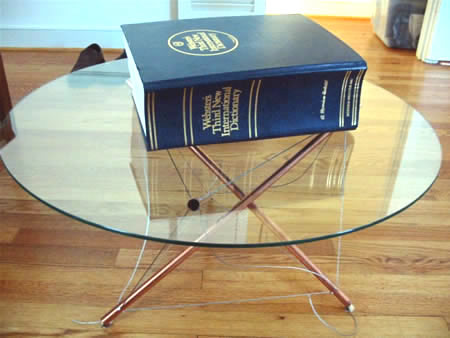
How To Build A 3 Strut Copper Base for a Table
How To Build A 3 Strut Copper Base for a Table
Procedure based on William Gilbert's procedure.
http://www.copper.org/consumers/copperhome/DIY/images/ctt_fig17.jpg
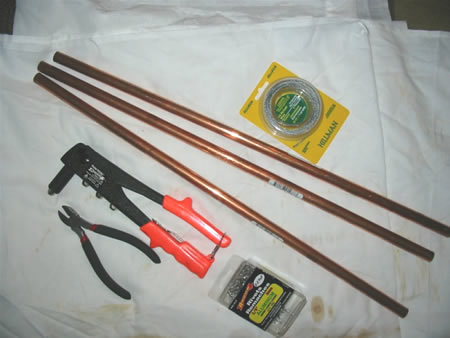
Step 1: Go Shopping for Materials
http://www.copper.org/consumers/copperhome/DIY/images/ctt_fig1.jpg
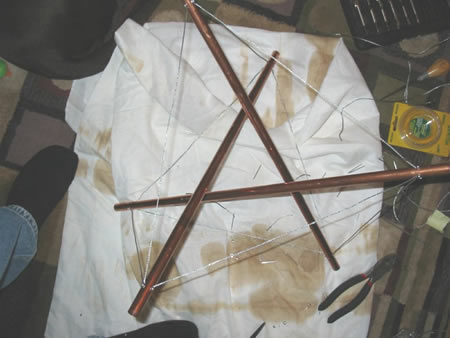
- Three pieces of 2" x 1/2" copper pipe, precut
- One roll of #4 picture hanging wire (25"e;)
- One box of short, 1/8" aluminum pop rivets
- Glass table top (28 x 1/4")
Tools used:
- Tape measure
- Black felt tip marker
- A piece of paper
- A drill with a 1/8" bit
- A center punch or awl
- A rivet gun (this is not an expensive tool)
- Wire cutters
- Laser level (optional)
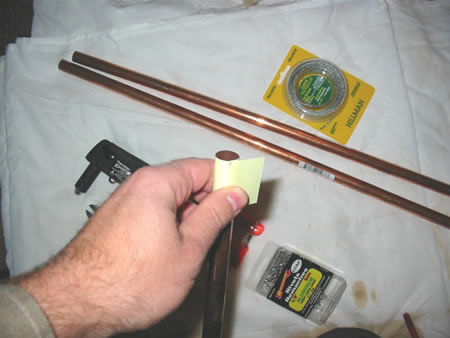
Step 2: Make the Drilling Template
http://www.copper.org/consumers/copperhome/DIY/images/ctt_fig2.jpg
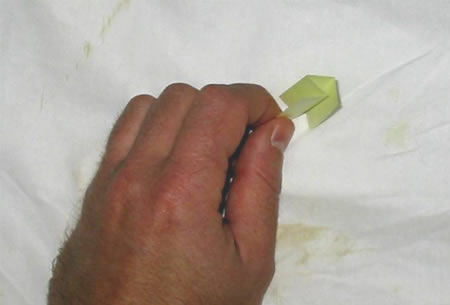
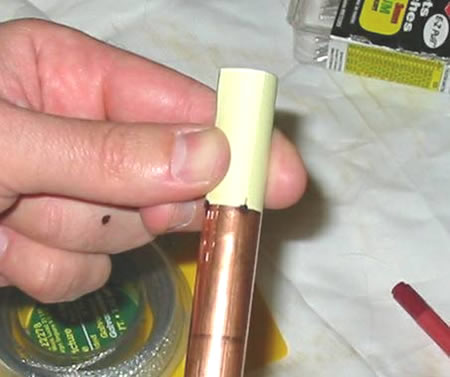
http://www.copper.org/consumers/copperhome/DIY/images/ctt_fig3.jpg You need to drill four holes in each end of the copper pipes, evenly spaced, and aligned one end to the other. A simple paper template helps with this. Cut a strip of paper 1 & 1/2" wide, and wrap it //tightly// around the copper pipe as shown. Mark where it meets back on itself, and cut it along that line. It should now perfectly circle the pipe. Fold the paper neatly into quarters along its length. Mark the bottom of each fold with a pen. The cut ends mark one of the four points.
Step 3: Use Your Drilling Template
http://www.copper.org/consumers/copperhome/DIY/images/ctt_fig4.jpg Wrap your template around one end of a copper pipe, flush against the end of the pipe. Use a marker to make a dots on the pipe at the base of the template. Four dots... one at each of the three creases, and one where the cut ends meet.
http://www.copper.org/consumers/copperhome/DIY/images/ctt_fig5.jpg http://www.copper.org/consumers/copperhome/DIY/images/ctt_fig6.jpg
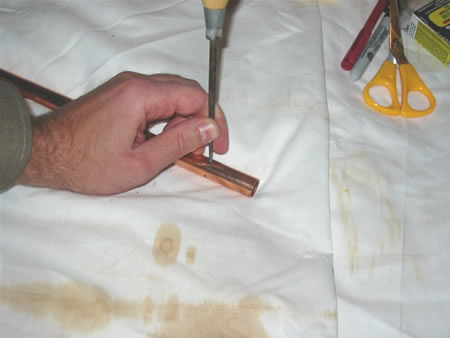
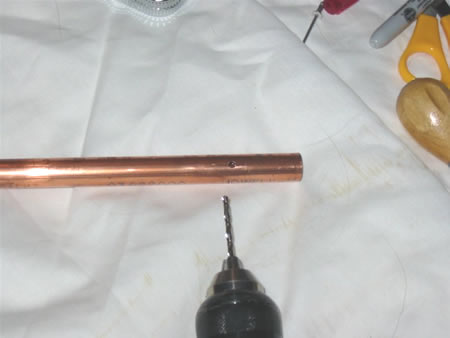
Do the same at the other end of the pipe, but this time //sight carefully along the length of the pipe and make sure that the holes at one end are aligned with the holes at the other.// No precise measurement of this is needed, but they should be roughly lined up. Center punch each of the eight dots, and drill 1/8" holes at each punch. //Work the drill up and down along the length of the pipe to slightly elongate each hole.// Copper is soft, so don't overdo it. Easier to enlarge the hole later than have to start over.
Step 4: POP! Goes the Rivet
http://www.copper.org/consumers/copperhome/DIY/images/ctt_fig7.jpg Put about 1/4" of wire through a hole in one of the pipes. You may want to put a little bend in the wire to help hook it in the hole. Load a rivet into the rivet gun and press it into the hole. With the wire in there as well, it should be a tight fit. Pop the rivet by pumping the handle of the rivet gun, as indicated by the manufacturer
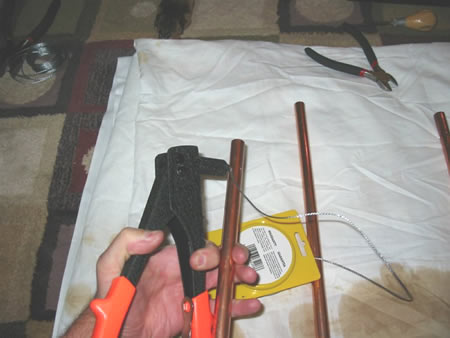
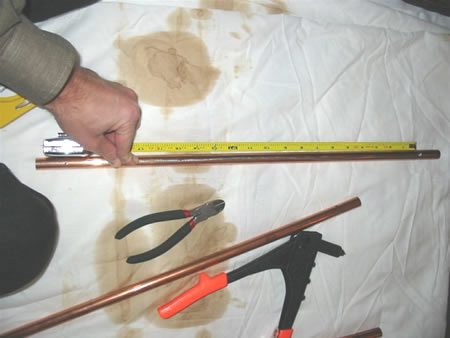
http://www.copper.org/consumers/copperhome/DIY/images/ctt_fig8.jpg Pull the wire tight along the length of the tube, and using a tape measure and marker, mark the wire 15" away from where it emerges from under the rivet. This is the position where the other end of the wire will go under a rivet. Cut the wire about 1/2" beyond the mark. Repeat this step on //one end only// of each of the three tubes. (15" was calculated as the distance between the holes - 21" - divided by 1.4. Adjust if necessary)
Step 5: Make a Hole
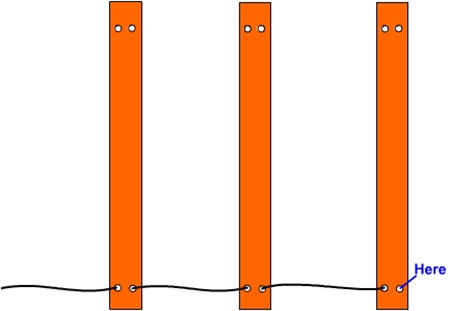
http://www.copper.org/consumers/copperhome/DIY/images/ctt_diagram1.jpg The three pipes will now be joined in a circle/triangle. Lay your three pipes side-by-side. Insert the wire from one pipe into the hole adjacent to the existing rivet on the next pipe, and rivet precisely at the black mark on the cable. Use the diagram at left as a guide. The final wire circles back to the first pipe (insert "here" on diagram).
Step 6: Stand It Up
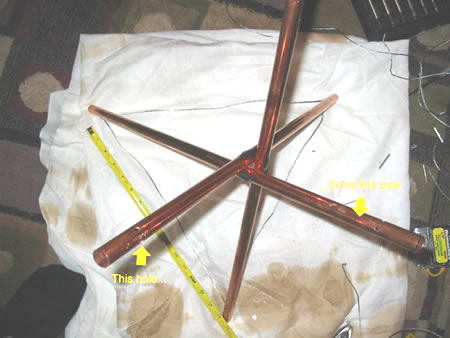
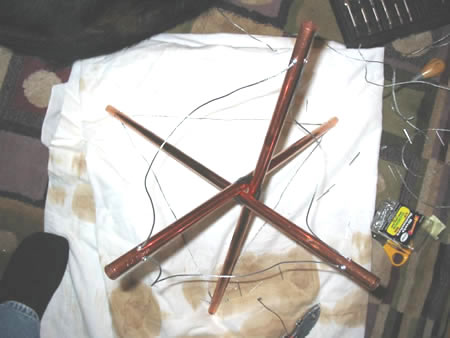
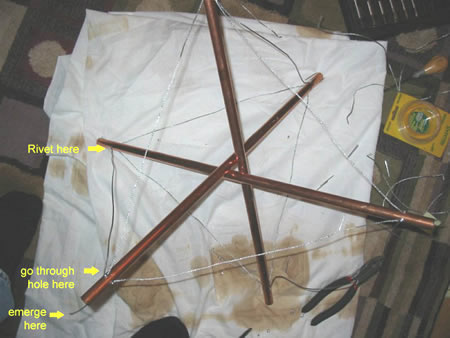
http://www.copper.org/consumers/copperhome/DIY/images/ctt_fig9.jpg Wrap some wire or electrical tape around the middles of the three pipes to bind them together. You should now be able to splay the legs and have it stand, as shown. With the bottoms of the legs joined, you must now prepare to join the tops. Take your time with the next step, and be sure to get it right. Notice that with the bottom wires tight, each leg will be faced by a hole on an adjacent leg (indicated by arrows in the picture above).
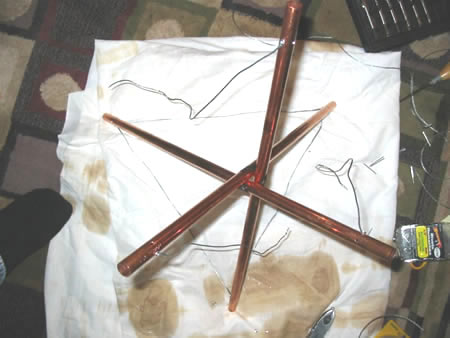
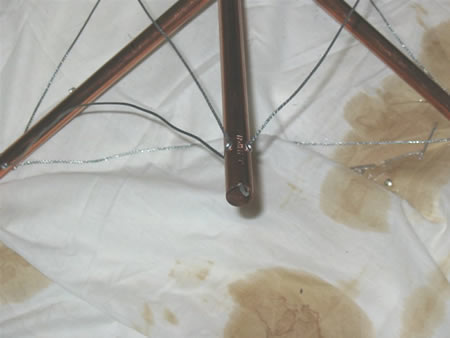
http://www.copper.org/consumers/copperhome/DIY/images/ctt_fig10.jpg Begin by inserting a wire into one facing hole on each leg, riveting, measuring to 15" and cutting it 1/2" long, just as before. The result should be ass shown in the above picture.
Step 7: Stitch It Up
http://www.copper.org/consumers/copperhome/DIY/images/ctt_fig11.jpg
Complete joining the tops of the legs. Notice that your structure now "twists." The one I made twists counterclockwise. All tensegrity structures are //chiral// like this... that is, they have handedness.
Step 8: Co-rotating Diagonals
http://www.copper.org/consumers/copperhome/DIY/images/ctt_fig12.jpg The completed structure has diagonals that go both with and against the rotation of the pipes. First install those that go //with// the twist. Install a wire in one of the bottom legs with a rivet. Extend it up to the top to the pipe that is almost above it, slightly ahead along the direction of twist. Cut it a few inches too long, and insert the wire through the facing hole and out the end of the pipe. This is best understood by looking at the above image, which is labeled.
http://www.copper.org/consumers/copperhome/DIY/images/ctt_fig13.jpg Repeat this for each leg. You should still have a leftover hole at each end of each leg. Those you will accomodate the counter-rotating diagonals, to be added later.
Step 9: Level and Secure
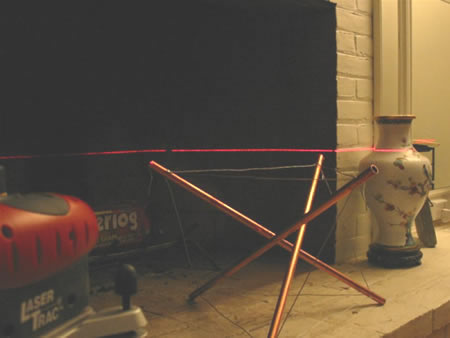
http://www.copper.org/consumers/copperhome/DIY/images/ctt_fig14.jpg The structure will probably now support itself, at least roughly. The next step is to expand the legs and level the structure. This is a pain. Begin by removing the tape holding the leg centers together, and counter-rotating the tops of the legs as the structure sits on the floor. Make sure the top and bottom wires are tight. Pull the diagonals tight by pulling the wires out the ends of the pipes. Level by eye, and bend the wires over the ends of the pipes to hold them roughly in place. You now have a self-supporting tensegrity structure. The pipes should not be touching one another. You can level the structure by measuring from the floor. I got a little fancier and used a laser level, as shown in the picture above.
http://www.copper.org/consumers/copperhome/DIY/images/ctt_fig15.jpg Adjust the diagonal wires, unbending and rebending over the pipe ends, and making sure everything is //tight//. Try to get the tops of all the pipes level. This is difficult since changing the tension in any member of a tensegrity structure changes the rest. Just be patient. Work slowly. When you have it right, pop rivet the wires in place.
Step 10: Done
http://www.copper.org/consumers/copperhome/DIY/images/ctt_fig16.jpg
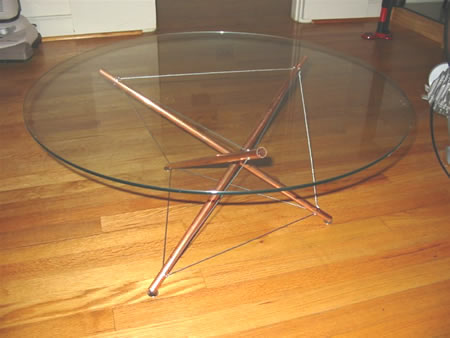
The structure will now support it's ultimate weight. In fact, now it needs to! You can stop at this point if you like. It's a strong structure once loaded, but not terribly stable. Notice that it's floppy if you pick it up. If you bump this table, even when loaded, it will bounce around a bit. But if you're anxious, you can be done now.... wuss. Put the structure on a smooth surface, and put something under each of the legs that will slide. I used coins. Put your top or any sort of big flat thing on top of the legs, and add a weight of several pounds. I used an unabridged dictionary. Notice that the legs spread a bit. How much can it support? In a previous version using #3 wire a table supported some nic-nacs, a heavy laptop computer, and my dinner... not to mention the large glass tabletop. Leave your table to sit overnight. The idea is to let the wires stretch out.
Optional Step 11: Install the Counter-rotating Diagonals and Secure
Author's Note: The "counter-rotating diagonal" wires tend to loosen over time as the picture wire creeps. The table works perfectly well without these, and you may wish to omit them from your project.
Leave the top and weight in place. If you put a level on top of the table at this point it will probably no longer be level. The effects of creep. There is little to be done about it, though. It should be close enough if you were careful in your measuring and had the wires taut when you did the initial leveling. Each end of each leg still has a hole available. Each hole will face the opposite end of another leg. Secure a wire to the top hole in a leg, and run it through the facing hole of a bottom leg. These diagonals will be running opposite to the rotation of the legs. Cut the wire generously long. This is shown in the picture (same as the one above). Pull the wires very tight with one hand, while you insert and pop a rivet with the other. Cut the wire flush. Repeat for all three legs. Make sure you use pliers or a stick to stuff the cut ends of the wires down inside the legs where they can't be seen. //Do NOT use your fingers! Those wires are sharp, and you WILL regret it!
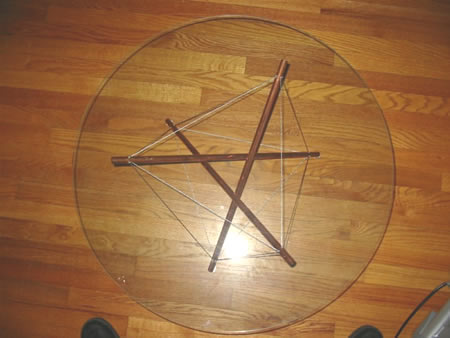
http://www.copper.org/consumers/copperhome/DIY/images/ctt_fig18.jpg Yes, you're done now. The tensegrity base should be nice and rigid when you hold it up in the air.
Citations //Copyright © 2010 Copper Development Association Inc. Affiliated with the International Copper Association, LTD. All Rights Reserved.// //Retrieved 16 Feb. 2010,http://www.copper.org/consumers/copperhome/DIY/cu_tensegrity_table.html/ //The instructions are based on William H. Guilford, Ph. D., who is an Associate Professor at the Molecular Biomechanics Laboratory, part of the Department of Biomedical Engineering at the University of Virginia. His original instructions were adapted.//
[[Category:Portal To Model Making"